| Sharepoint 2010 contains a user profile system which supports properties being mapped to Active Directory attributes. By default, when synchronization is performed between it and Active Directory, there are a handful of mappings already defined (such as mapping the firstname in the user profile system with the firstname in Active Directory). The purpose of this tutorial is to go into detail about how to access and modify the user profile as far as Active Directory is concerned. If a new property is created in Sharepoint 2010 it will not be replicated into Active Directory unless the property is mapped to an existing property in Active Directory and it is allowed. |
You can create new properties in the user profile system and map those to Active Directory (perhaps you want to track more data than what is provided by default). Depending on your environment you could also create new attributes in Active Directory that don't already exist (so you can manage common data between the Sharepoint user profile system and other systems outside of Sharepoint). If this is the case, you may want to check out this additional documentation:
Information on Creating Attributes in Active Directory
technet.microsoft.com/en-us/library/bb727064.aspx
technet.microsoft.com/en-us/library/cc773354%28WS.10%29.aspx
technet.microsoft.com/en-us/library/cc773354%28WS.10%29.aspx
technet.microsoft.com/en-us/library/cc731607%28WS.10%29.aspx
www.petri.co.il/add_additional_attributes_to_user_objects.htm
Regardless of if creating attributes in Active Directory are needed, you should have some type of strategy to define (1) what you want to have inside of the user profile system, (2) what is mapped to Active Directory, and, (3) properties in the user profile system who's values originate from other sources. This XLSX file (zipped) is an early draft I've used to address those concerns. Additionally, there is a nice VBS script that will expose all the Active Directory attributes in your environment since some attributes in Active Directory are not common to everyone utilizing it. Finally, you can check out the default list of Active Directory attributes from Microsoft so you can see how your Active Directory may differ.
Now let's see how to work with Sharepoint 2010 user profiles.
 (Enlarge) |
| |
 (Enlarge) |
| |
 (Enlarge) |
| |
 (Enlarge) |
| |
 (Enlarge) |
| |
 (Enlarge) |
| |
 (Enlarge) |
| |
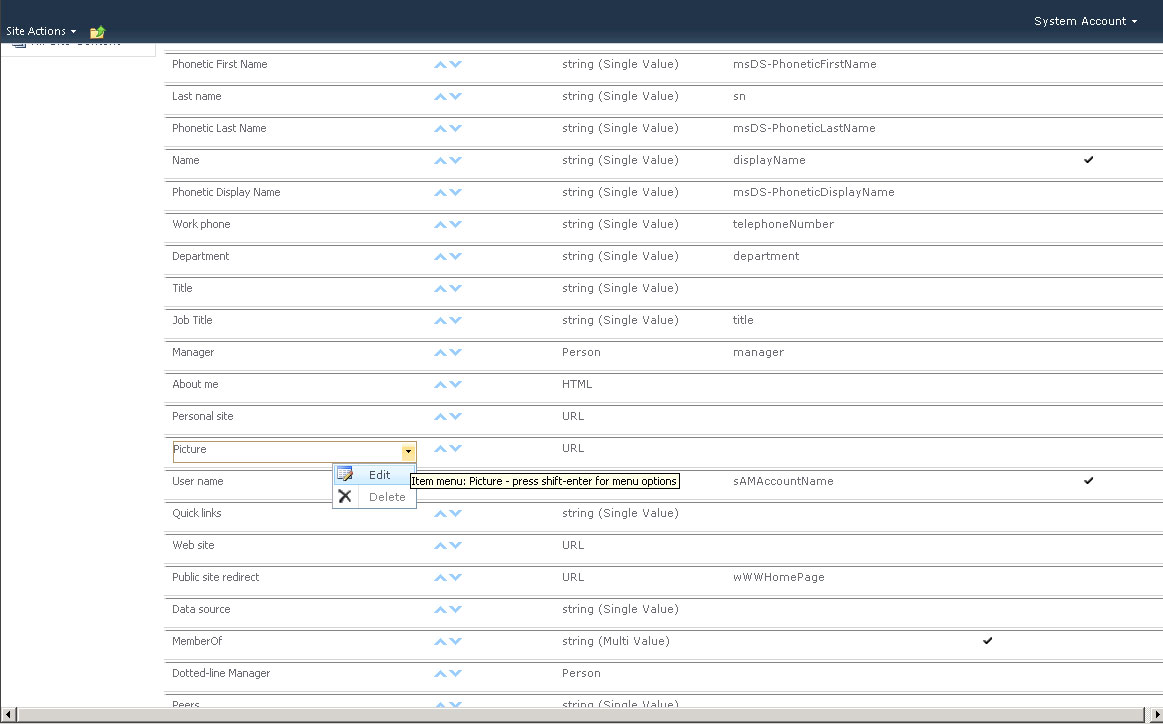
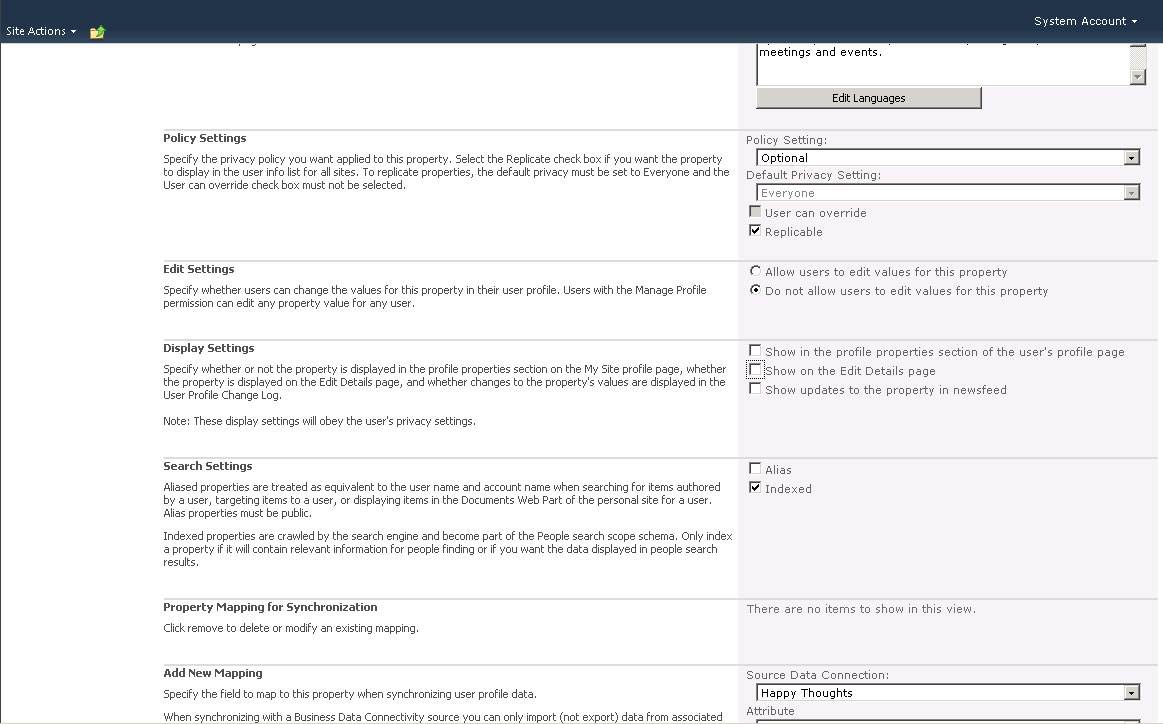
When you create a new property (will appear under Custom Properties), if you want to map that new property to an existing Active Directory attribute keep the following in mind:
- When you name the new property you have to assign it the same type of Property Type (such as String/Multi) as the existing Active Directory attribute.
- Under the section "Add New Mapping" you will want to (1) select the data connection (page may refresh if you have more than one), (2) attribute to map to, (3) and the direction; more than likely Import. Then click on the "Add" button. The page will refresh and you will notice that the section "Property Mapping for Synchronization" will contain the mapping.
Configure Active Directory (AD) Synchronization for SharePoint 2010 |
Apr
04
Step 1 – Prerequisites
Account needed for Syncing
We need an account set up for the AD profile synchronization. Let’s call it “Service-spADsync“, we need to configure a couple of things on this account in AD:
- Add “Replicate Directory Changes” permission
- On the domain controller, click Start, click Administrative Tools, and then click Active Directory Users and Computers.
- In Active Directory Users and Computers, right-click the domain, and then click Delegate Control.
- On the first page of the Delegation of Control Wizard, click Next.
- In the Users or Groups page, click Add.
- Type the name of the synchronization account, and then click OK.
- Click Next.
- In the Tasks to Delegate page, select Create a custom task to delegate, and then click Next.
- On the Active Directory Object Type page, select This folder, existing objects in this folder, and creation of new objects in this folder, and then click Next.
- On the Permissions page, in the Permissions box, select Replicate Directory Changes, and then click Next.
- Click Finish.
- Add account to “Pre-Windows 2000 Compatible Access” group
- On the domain controller, click Start, click Administrative Tools, and then click Active Directory Users and Computers.
- In Active Directory Users and Computers, expand the domain, expand Builtin, right-click Pre-Windows 2000 Compatible Access, and then click Properties.
- In the Properties dialog box, select the Members tab, and then click Add.
- Type the name of the synchronization account, and then click OK.
- Click OK.
- Grant Replicate Directory Changes permission on the cn=configuration container
- On the domain controller, click Start, click Run, type adsiedit.msc, and then click OK.
- In ADSI Edit, if the Configuration node is not already present, select ADSI Edit, on the Action menu click Connect to, in the Connection Point area of the Connection Settings dialog box select Select a well known Naming Context, select Configuration from the drop-down list, and then click OK.
- Expand the Configuration node, right-click the CN=Configuration… node, and then click Properties.
- In the Properties dialog box, select the Security tab.
- In the Group or user names section, click Add.
- Type the name of the synchronization account, and then click OK.
- In the Group or user names section, select the synchronization account.
- In the Permissions section, select Replicating Directory Changes (select Replicate Directory Changes on Windows Server 2003), and then click OK.
Forefront Services
On the box that will be running the “User Profile Synchronization Service”Go to Start > Administrative Tools > Services
Set both “Forefront Identity Manager Service” and “Forefront Identity Manager Synchronization Service” to run under your farm account and set them to automatically start and start both services

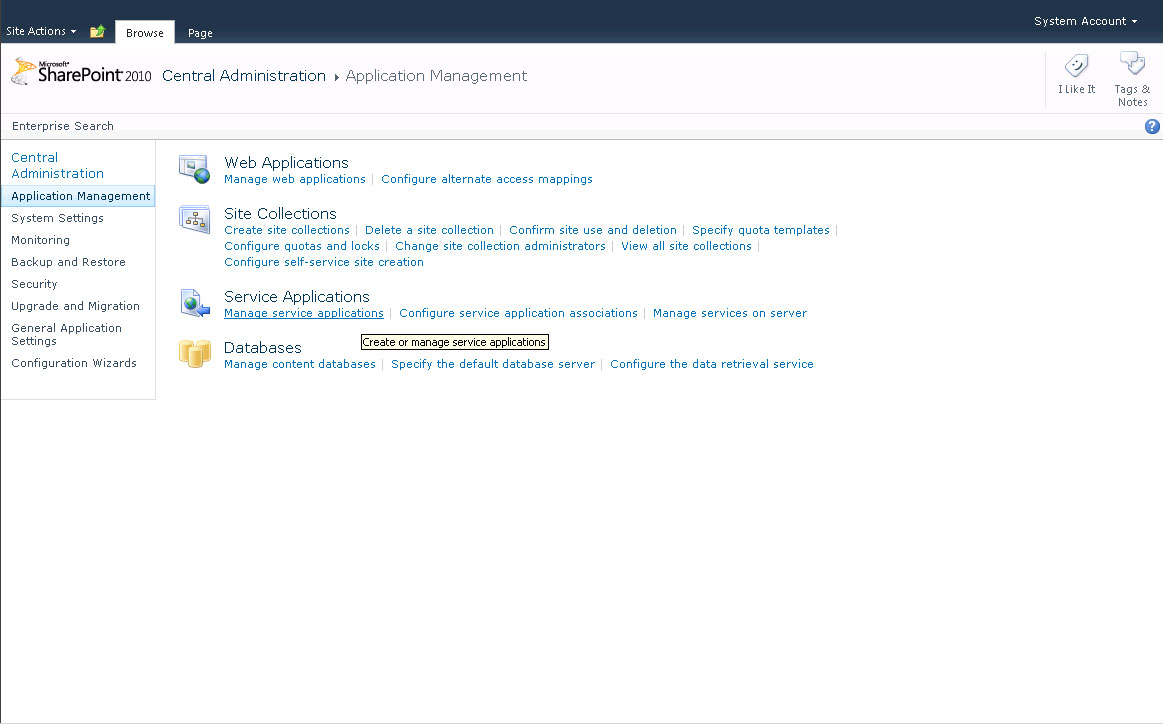
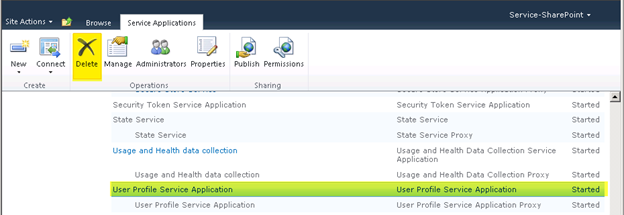
Step 2 – Delete any current User Profile Service Application (Optional)
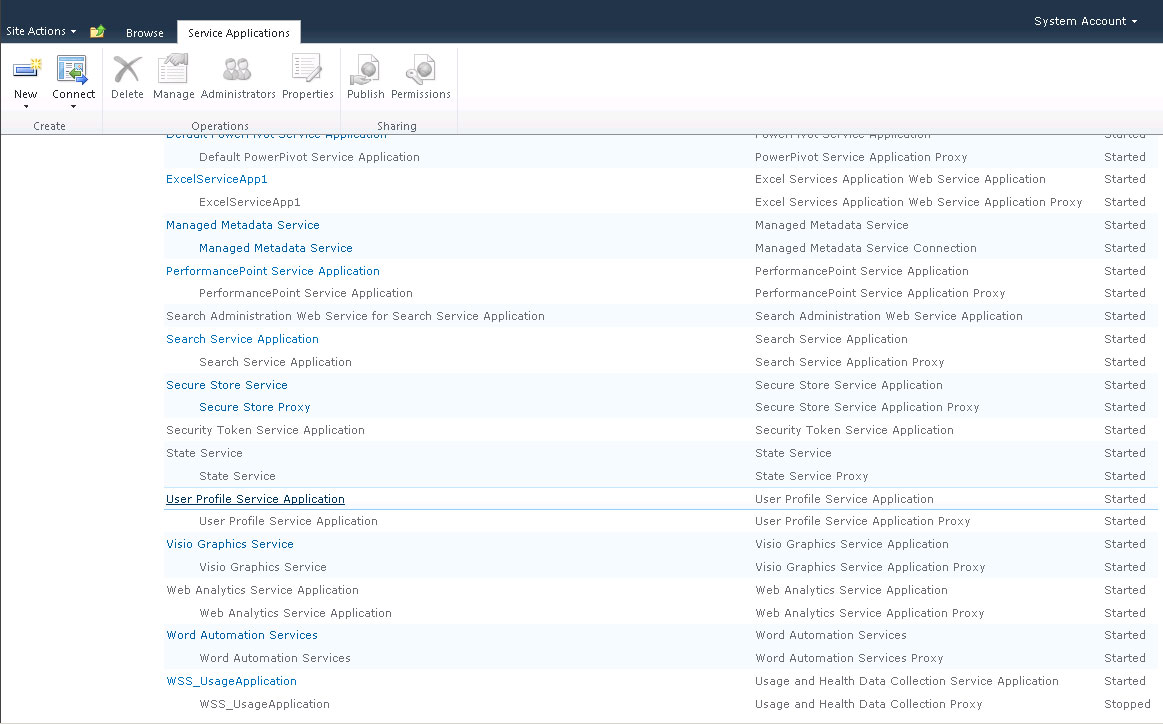
I like to delete the current “User Profile Service Application” that gets created if you use the wizard to create your farm, I will be creating my own in the next step.Under Central Administration > Application Management > Manage Service Applications
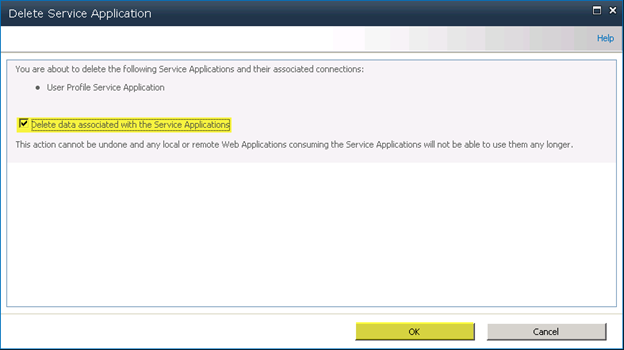
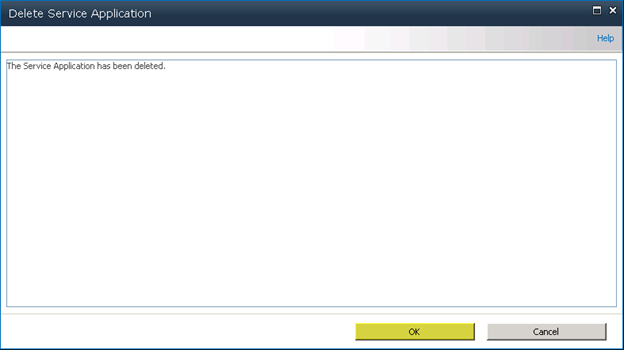
Select “User Profile Service Application” and then select Delete from the ribbon bar
Press “OK”
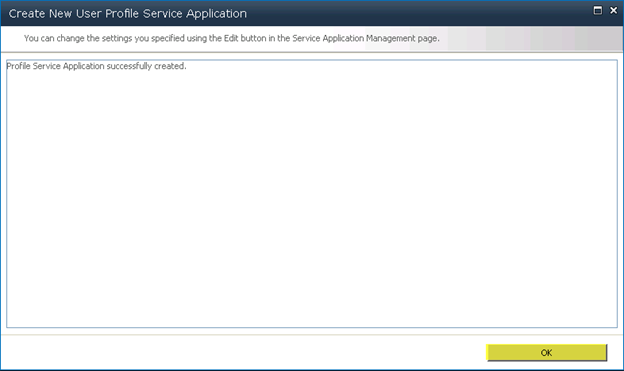
Step 3 – Create New User Profile Service Application
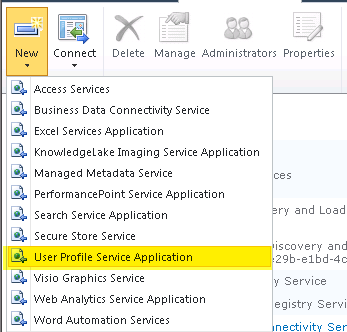
Under Central Administration > Application Management > Manage Service ApplicationsSelect “User Profile Service Application” under the “New” button on the ribbon bar
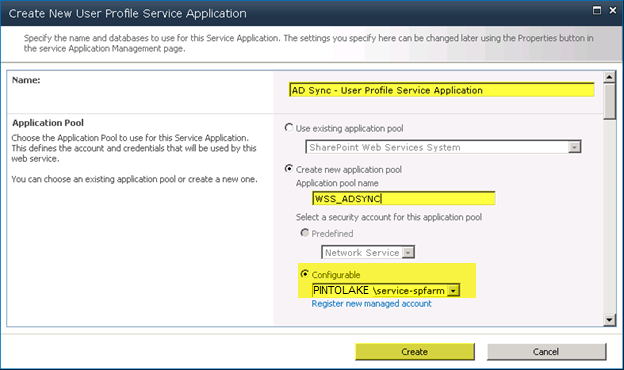
| If you do not have “User Profile Service” installed then you will have more options than the couple of options listed below. Just fill out all the appropriate information to create the application. Other options that will appear are things like creating the Profile DB and other options related to My Sites. | 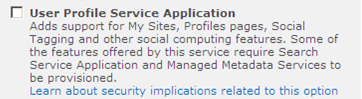 |
Create a new application pool called WSS_ADSYNC
Select the account to use for the application pool; I use my farm account which also runs all other service applications
Press “Create”
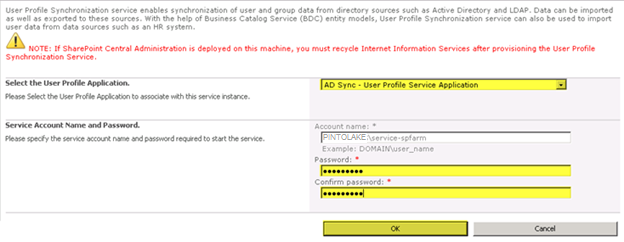
Step 4 – Configure the Service
Under Central Administration > System Settings > Manage services on serverPress “Start” next to “User Profile Synchronization Service”

Enter the password for the service account you are using
Press “OK”


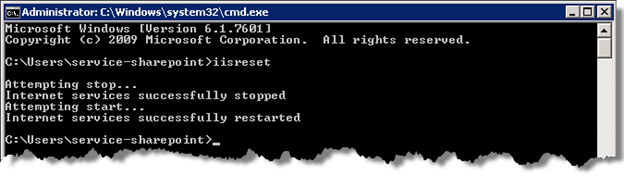
Type in “IISRESET”
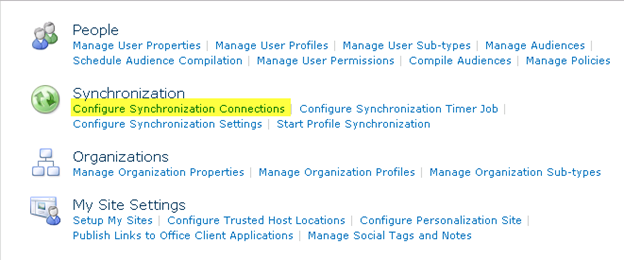
Step 5 – Configure connections and import data from Active Directory
Under Central Administration > Application Management > Manage Service ApplicationsSelect “AD Sync User Profile Service Application” and then select Manage from the ribbon bar or you can just click the name “AD Sync User Profile Service Application”
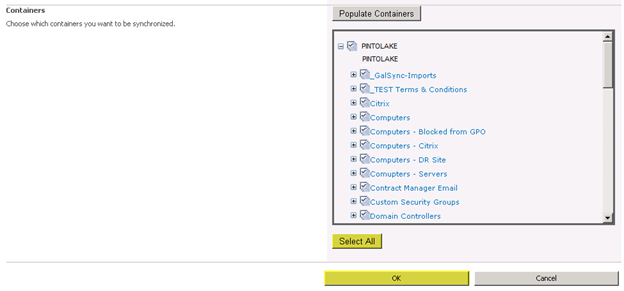
Click “Configure Synchronization Connections”
The type is “Active Directory”
The Forest name is “PINTOLAKE”
The Authentication Provider Type is “Windows Authentication”
Enter the Service Account we created in Step 1 and the password
The port for AD is “389″
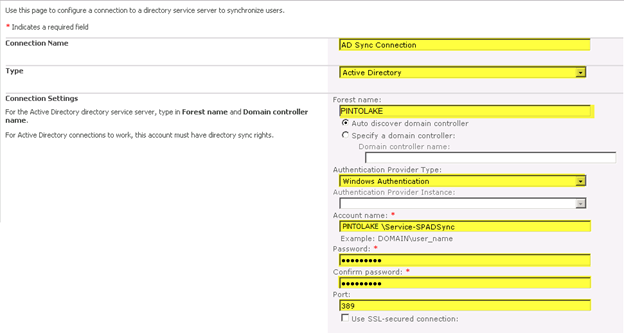
Press “OK”


Step 6 -Synchronization Options (Optional)
There are a couple options you can go through before you start synchronization- Define connection filters – this is if you want to filter information from the AD sync
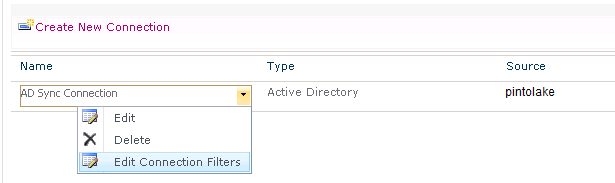
Select “AD Sync User Profile Service Application” and then select Manage from the ribbon bar or you can just click the name “AD Sync User Profile Service Application”
Click “Configure Synchronization Connections” then pull the drop down menu on your connection then select “Edit Connection Filters”
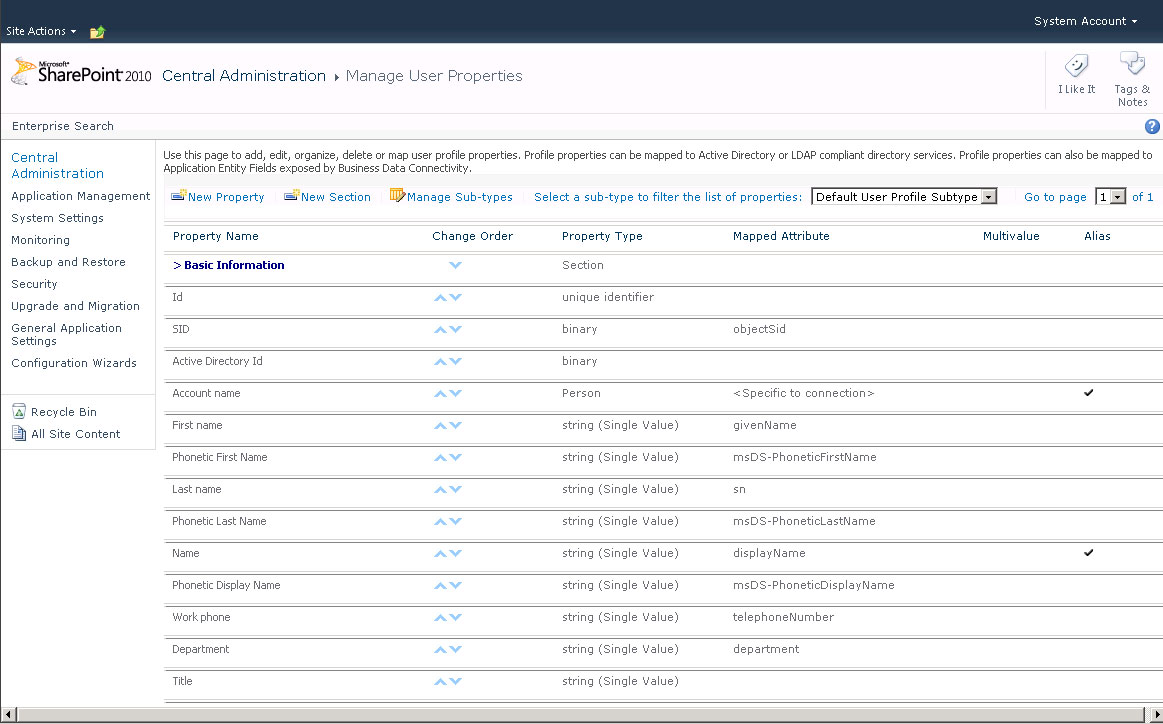
- Map User Profile Properties – this option already has a bunch of preconfigured fields but you might need to change some of them or reconfigure existing ones
Select “AD Sync User Profile Service Application” and then select Manage from the ribbon bar or you can just click the name “AD Sync User Profile Service Application”
Click “Manage User Properties” under the “People” section

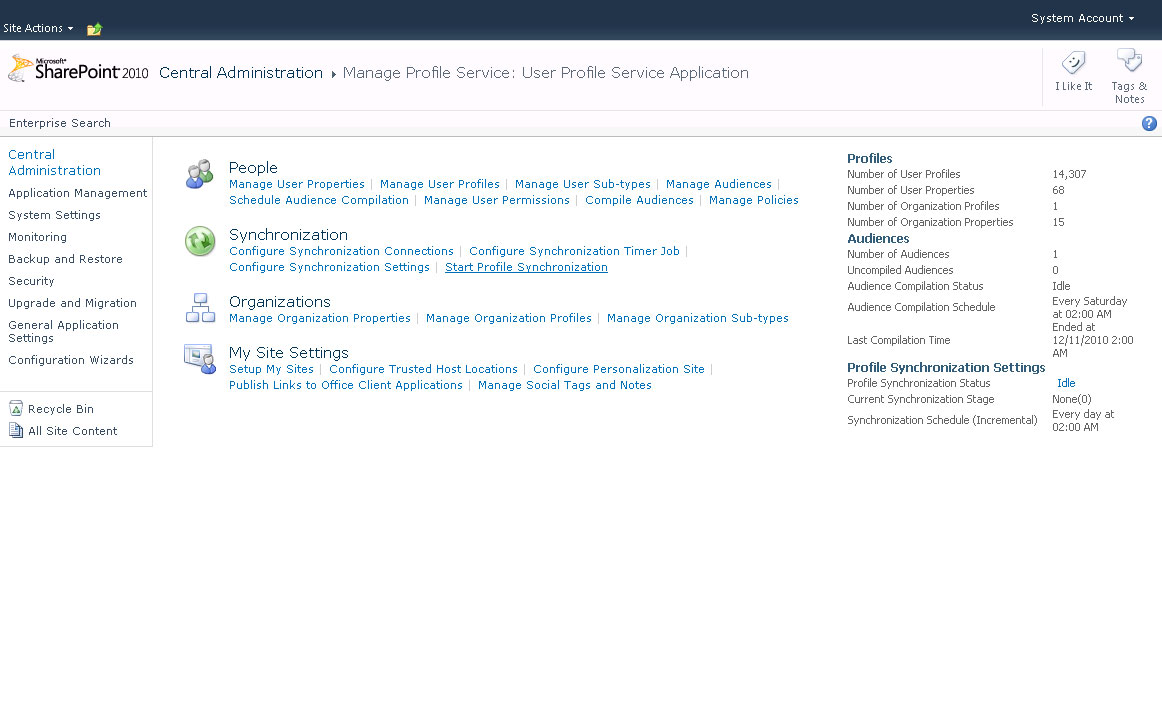
Step 7 -Start Profile Synchronization
Under Central Administration > Application Management > Manage Service ApplicationsSelect “AD Sync User Profile Service Application” and then select Manage from the ribbon bar or you can just click the name “AD Sync User Profile Service Application”
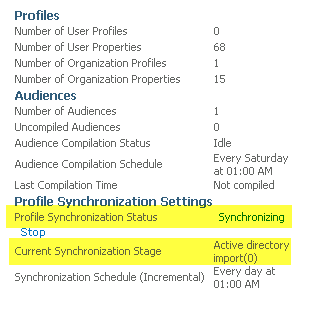
Under “Synchronization” select “Start Profile Synchronization”

Press “OK”

Start of Sync
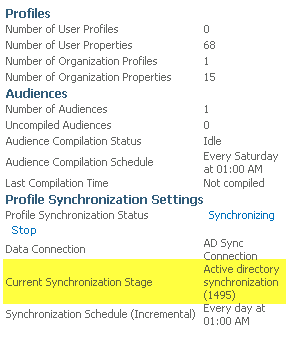
Select “AD Sync User Profile Service Application” and then select Manage from the ribbon bar or you can just click the name “AD Sync User Profile Service Application”
Under “Synchronization” select “Configure Synchronization Timer Job”
How you can create permission level and attach to group and particuler group should be attached to specific URLs.
1. You have one featuer of Site, In docflow we are performing following tasks on feature activited
1. Setting Navigation
2. Setting sitePermission
3. Setting MasterPages
4. Setting images.
2. Performing the feature activation from Code
3. In SetPermission we have method to add custom Permission level, custom Groups, Add permission levels to groups, add list permission and attached permission level to lists from Code only.
4. if you see the view permission level in user group section you will have multiple links with specific permission levels
Authentication in Sharepoint
Classic Mode: This is no different from the traditional AD based authentication. One contraint with classic mode is that you cannot implement "Forms Based Authetication" later on, if you want to.
Although you can convert "classic mode" to "claims based" but will have to use shell script. There is no UI available in Central Admin to do it.
Claims Based: Claims based authenticaition gives you option to autheticate users using AD as well as Form based authentication for the same web application. It's based on Windows Identity Foundation, and can enable several advanced authentication scenarios as described in this article:
http://msdn.microsoft.com/en-us/library/hh394901(v=office.14).aspx
The following diagram illustrates multiple types of authentication implemented on the default zone for a partner collaboration site.

In the diagram, users from different directory stores access the partner Web site by using the same URL. A dashed box surrounding partner companies shows the relationship between the user directory and the authentication type that is configured in the default zone. For more information about this design example, see Design sample: Corporate deployment (SharePoint Server 2010).
The following diagram illustrates multiple zones that are implemented to accommodate different authentication types for a partner collaboration site.

In the diagram, the default zone is used for remote employees. Each zone has a different URL associated with it. Employees use a different zone depending on whether they are working in the office or are working remotely. For more information about this design example, see Design sample: Corporate deployment (SharePoint Server 2010).
Although you can convert "classic mode" to "claims based" but will have to use shell script. There is no UI available in Central Admin to do it.
Claims Based: Claims based authenticaition gives you option to autheticate users using AD as well as Form based authentication for the same web application. It's based on Windows Identity Foundation, and can enable several advanced authentication scenarios as described in this article:
http://msdn.microsoft.com/en-us/library/hh394901(v=office.14).aspx
Supported authentication methods
SharePoint Server 2010 supports authentication methods that were included in previous versions and also introduces support for token-based authentication that is based on Security Assertion Markup Language (SAML). The following table lists the supported authentication methods.
| Method category | Authentication methods | Notes |
|---|---|---|
| Windows authentication |
| |
| Forms-based authentication |
| |
| SAML token-based authentication (new with SharePoint Server 2010) |
| Supported only with SAML 1.1 that uses the WS-Federation Passive Requestor Profile (WS-F PRP). Client certificate authentication is possible through integration with AD FS 2.0. For additional information, see Configure Client Certificate Authentication (SharePoint Server 2010). |
The following diagram illustrates multiple types of authentication implemented on the default zone for a partner collaboration site.
In the diagram, users from different directory stores access the partner Web site by using the same URL. A dashed box surrounding partner companies shows the relationship between the user directory and the authentication type that is configured in the default zone. For more information about this design example, see Design sample: Corporate deployment (SharePoint Server 2010).
The following diagram illustrates multiple zones that are implemented to accommodate different authentication types for a partner collaboration site.
In the diagram, the default zone is used for remote employees. Each zone has a different URL associated with it. Employees use a different zone depending on whether they are working in the office or are working remotely. For more information about this design example, see Design sample: Corporate deployment (SharePoint Server 2010).
Claims Architecture and Scenarios for SharePoint 2010 Developers
SharePoint 2010
Summary: Learn how claims-based authentication in Microsoft SharePoint 2010 enables you to support advanced scenarios that require custom development.
Applies to: Microsoft SharePoint Foundation 2010 | Microsoft SharePoint Server 2010
Provided by: Javier Dalzell, Schakra Inc
Contents
- Overview of Advanced Claims-Based Authentication Scenarios
- Creating Custom Login Pages Used by the Forms-Based Authentication Feature
- Customizing Authentication Selection Pages to Provide Additional Information
- Adding Context-Based Claims to the User's Claims Token
- Authenticating from a Client Application by Following the Pattern of Passive Authentication
- Migrating ISAPI-Based Authentication Schemes to SharePoint 2010
- Supporting Claims Tokens Issued by SharePoint 2010 in Claims-Aware Web Services
- Enabling High-Security Authentication (2FA) in SharePoint 2010
- Conclusion
- About the Author
- Additional Resources
Overview of Advanced Claims-Based Authentication Scenarios
An important aspect of claims-based authentication in Microsoft SharePoint 2010 is that solution developers can use its power programmatically to enable more advanced authentication scenarios.
This article walks you through different scenarios that involve the following tasks:
To learn more about claims-based authentication, see Claims Tips 1: Learning About Claims-Based Authentication in SharePoint 2010.
Although this article does not provide a walkthrough or code samples, it can help you understand the concepts behind each of the tasks in the previous list. For walkthroughs with sample code, see Claims and Security Technical Articles for SharePoint 2010.
This article walks you through different scenarios that involve the following tasks:
- Creating custom login pages
- Customizing the authentication selection page
- Adding context-based claims to the user's claims token
- Authenticating from a client application
- Migrating authentication schemes to SharePoint 2010 that are based on Internet Server API (ISAPI)
- Supporting the claims token that is issued by SharePoint 2010 in claims-aware web services
- Enabling high-security authentication, including two-factor authentication (2FA), in SharePoint 2010
To learn more about claims-based authentication, see Claims Tips 1: Learning About Claims-Based Authentication in SharePoint 2010.
Although this article does not provide a walkthrough or code samples, it can help you understand the concepts behind each of the tasks in the previous list. For walkthroughs with sample code, see Claims and Security Technical Articles for SharePoint 2010.
Understanding Authentication Flows in SharePoint 2010
When you configure a SharePoint 2010 web application in claims mode, different authentication options are available. These options determine the flow of the authentication process. To learn more about authentication options, see Authorization and Authentication.
Figure 1 shows the steps in the authentication process. It explains, in order, the different routes that the authentication process flow can have, based on the authentication options that are available in SharePoint 2010.
Figure 1. High-level architecture of the claims-based authentication process

As mentioned previously, the flow of the authentication process is defined by the options that you select during the configuration of the zone. The following figures show how these options define the flow of the authentication.
Figure 2. Authentication flow
 Each of the authentication types follows a specific pipeline. Figures 3, 4, and 5 can help you understand how each authentication type works.
Figure 1 shows the steps in the authentication process. It explains, in order, the different routes that the authentication process flow can have, based on the authentication options that are available in SharePoint 2010.
Figure 1. High-level architecture of the claims-based authentication process
Steps in the Authentication Process
- The client requests a SharePoint resource.
- As part of the request pipeline, if the request is not authenticated, the authentication components route the request based on the authentication settings for that zone.
- The request is then processed by the authentication components. When more than one authentication method is configured for the given zone, the authentication selection page enables the user to choose the authentication method. If only one authentication method is specified, the request is processed directly by the specified authentication method.
- The user is authenticated by the identity provider.
- If authentication succeeds, the SharePoint security token service (STS) generates a claims-based token for the user with the information provided by the identity provider. If additional claims providers are configured, the STS augments the user's token with the claims given by the claims provider. For more information about claims providers, see Claims Tips 2: Learning About Claims-Based Authentication in SharePoint 2010.
- The claims-based token of the user is sent back to the authentication components.
- The authentication components redirect the request back to the resource address, with the claims-based token issued for the user.
- The rest of the request pipeline is executed and a response is sent back to the requestor (client). As part of the request pipeline, the authorization is completed.
Figure 2. Authentication flow
Each of the authentication types follows a specific pipeline. Figures 3, 4, and 5 can help you understand how each authentication type works.Windows Authentication Pipeline
When Windows authentication is the only authentication type enabled in a zone, users are silently authenticated by using NTLM or Negotiate (Kerberos protocol) during the request pipeline. After a user is authenticated, a claims-based token is requested from the SharePoint STS and a claims identity is created. After this point, SharePoint continues processing the request, including making the proper access checks.
Figure 3. Windows authentication flow
 When the Windows authentication type is enabled along with one or more other authentication types, the user is redirected to the authentication selection page. If the user selects the option that uses Windows authentication, the user request is redirected to the Windows authentication page, which is silent (no other UI is displayed to the user to indicate that the user is being redirected, unless basic authentication is configured). On the Windows authentication page, when the user is authenticated, a claims-based token is requested and the user is sent back to the requested resource. Because the request contains a claims-based token that was issued by SharePoint STS, a claims identity is created and the request process continues.
Figure 4 shows the Windows authentication process flow and lists the authentication steps in order.
Figure 4. Windows authentication process

Figure 3. Windows authentication flow
When the Windows authentication type is enabled along with one or more other authentication types, the user is redirected to the authentication selection page. If the user selects the option that uses Windows authentication, the user request is redirected to the Windows authentication page, which is silent (no other UI is displayed to the user to indicate that the user is being redirected, unless basic authentication is configured). On the Windows authentication page, when the user is authenticated, a claims-based token is requested and the user is sent back to the requested resource. Because the request contains a claims-based token that was issued by SharePoint STS, a claims identity is created and the request process continues.Figure 4 shows the Windows authentication process flow and lists the authentication steps in order.
Figure 4. Windows authentication process
Understanding the Windows Authentication Process
- The user requests a SharePoint 2010 resource.
- User authentication (NTLM challenge/Kerberos negotiation) occurs.
- The claims-based token request is sent to the SharePoint 2010 STS.
- SharePoint STS gets the user's security groups from the Windows token and adds them as user claims in the token.
 Note:
Note: The group SID is what is added in the claims token. - The SharePoint STS gets additional claims for the user (if an additional claims provider is registered for that web application/zone).
- The claims-based token is issued.
- The request is processed by the rest of the components in the pipeline.
- The response is sent back to the user.
Forms-Based Authentication Pipeline
In the case of forms-based authentication, the user is redirected to the SharePoint forms-based login page. If additional authentication types are configured, the user is redirected to the authentication selection page first, and then to the login page if the user selects the option that is linked to the forms-based authentication type.
The SharePoint forms-based login page collects the credentials of the user, which are then sent to the SharePoint 2010 STS. The STS calls the membership provider that is associated with that web application, to validate the user's credentials. If this succeeds, the STS retrieves the roles that the user belongs to and adds these as claims in the claims-based token that is sent back to the login page.
From the login page, after the claims-based token is issued, the user is sent back to the request resource and the process continues in the same way as in Windows authentication.
Figure 5. Forms-based authentication process
Understanding the Forms-Based Authentication Process
- The user requests a SharePoint 2010 resource.
- SharePoint redirects the user to the forms-based authentication login page.
- The username and password are collected from the user and sent to the SharePoint 2010 STS.
- STS validates the user's credentials with the membership provider and, if validation succeeds, STS requests all the roles that the user belongs to and adds those claims to the user's token.
- The SharePoint STS gets additional claims for the user (if an additional claims provider is registered for that web application/zone).
- The claims-based token is issued to the user.
- The request is processed by the rest of the components in the pipeline.
- The response is sent back to the user.
SAML Token-Based Authentication Pipeline
Out-of-the box, with the default implementation of Active Directory Federation Services (AD FS), when SAML token-based authentication is enabled in the zone settings, users are redirected to a "silent" authentication page, which then redirects the user to the login page, as specified in the SAML-based authentication provider. (However any other AD FS configuration, or any other identity provider may not behave this way). To learn more about SAML authentication providers, see the "Implementing SAML token-based authentication" section in Plan Authentication Methods (SharePoint Foundation 2010) on Microsoft TechNet.
If more than one SAML-based authentication provider or additional authentication types are enabled in the web application, the user is redirected first to the authentication selection page, and then to the corresponding login page.
After the user is authenticated by the authentication provider, a SAML token is issued, and the user is redirected back to the SharePoint 2010 SAML token–based authentication page. The SAML token is then included in the request with the redirect. This process is known as "passive profiles". To learn more about passive profiles, see the blog post Windows Identity Foundation 101's : WS-Federation Passive Requestor Profile (Part 1 of 2).
The SAML authentication page requests a claims-based token from the SharePoint 2010 internal STS; the token request contains the original SAML token that was issued by the authentication provider. SharePoint STS then validates the token and issues the user token. This user token is then added to the request and the SAML authentication page redirects the user back to the original resource. After this point, the same process follows as in the other authentication flows.
Figure 6. SAML claims-based authentication process

The identity provider is configured in SharePoint 2010 as a trusted login provider. Depending on the scenario, the identity provider could be the enterprise STS or an external STS in the case of a federated login provider. Some examples of federated login providers are a partner STS (to authenticate a partner user that does not exist in the enterprise user repository) or an external authentication provider like Windows Live ID.
Although a trusted login provider could be an external identity provider (partner STS) in SharePoint 2010, we recommend that you federate the authentication through your enterprise STS, instead of establishing the trust directly in SharePoint 2010. Then, configure the trusts with the other STS in the enterprise STS. This has the benefit of having only one entry point, where all corporate policies can be enforced. Another benefit is that most identity management systems that support claims offer better tools for managing trusts with the federated STS. If you have multiple SharePoint 2010 farms, using your enterprise STS as your "identity provider hub" enables you to manage the trusts in one place instead of in multiple places (in each SharePoint farm).
Now that you have learned about the authentication process flow, you can explore different authentication scenarios and the options that you have to address these scenarios.
The following scenarios represent typical cases that help demonstrate problems and give implementation alternatives. Analyze your scenario and, based on the specifics of your environment, decide which solutions fit best.
If more than one SAML-based authentication provider or additional authentication types are enabled in the web application, the user is redirected first to the authentication selection page, and then to the corresponding login page.
After the user is authenticated by the authentication provider, a SAML token is issued, and the user is redirected back to the SharePoint 2010 SAML token–based authentication page. The SAML token is then included in the request with the redirect. This process is known as "passive profiles". To learn more about passive profiles, see the blog post Windows Identity Foundation 101's : WS-Federation Passive Requestor Profile (Part 1 of 2).
The SAML authentication page requests a claims-based token from the SharePoint 2010 internal STS; the token request contains the original SAML token that was issued by the authentication provider. SharePoint STS then validates the token and issues the user token. This user token is then added to the request and the SAML authentication page redirects the user back to the original resource. After this point, the same process follows as in the other authentication flows.
Figure 6. SAML claims-based authentication process
Understanding the SAML Claims-Based Authentication Process
- The user requests a SharePoint 2010 resource.
- SharePoint redirects the user to the SAML authentication page.
- Based on the configuration of the trusted login provider, the request is redirected to the enterprise STS login page or to the federated STS login page.
- The user provides credentials and STS issues a SAML claims-based token.
- The external STS issues the user claims-based token.
- A claims-based token for the user is requested from the SharePoint STS, and the token from the external STS is used as the authentication proof.
- SharePoint STS gets additional claims for the user (if an additional claims provider is registered for that web application or zone).
- SharePoint STS issues the claims-based token.
- The request is processed by the rest of the components in the pipeline.
- The response is sent back to the user.
Although a trusted login provider could be an external identity provider (partner STS) in SharePoint 2010, we recommend that you federate the authentication through your enterprise STS, instead of establishing the trust directly in SharePoint 2010. Then, configure the trusts with the other STS in the enterprise STS. This has the benefit of having only one entry point, where all corporate policies can be enforced. Another benefit is that most identity management systems that support claims offer better tools for managing trusts with the federated STS. If you have multiple SharePoint 2010 farms, using your enterprise STS as your "identity provider hub" enables you to manage the trusts in one place instead of in multiple places (in each SharePoint farm).
 Important: Important: |
|---|
| In all authentication types, the SharePoint internal STS calls any claims provider that is enabled for that web application or zone, and augments the user token with any claims that are given by the claims provider. To learn more about claims providers, see Claims Tips 1: Learning About Claims-Based Authentication in SharePoint 2010. |
The following scenarios represent typical cases that help demonstrate problems and give implementation alternatives. Analyze your scenario and, based on the specifics of your environment, decide which solutions fit best.
Creating Custom Login Pages Used by the Forms-Based Authentication Feature
SharePoint 2010 includes a default login page that is used by the forms-based authentication feature. As described in the following scenarios, in some cases you have to make changes to this default login page.
There are many scenarios that could require you to make changes in the login page; some of them are discussed in the following sections.
| Note: |
|---|
| Although it is possible to change the behavior of the login page to enable high-security authentication schemes like two-factor authentication, it is not recommended. Instead, you should follow the approach described in the Enabling High-Security Authentication (2FA) in SharePoint 2010 section later in this article. |
Addressing Authentication in Extranet Scenarios
There are multiple ways to address authentication in extranet scenarios. When possible, you should take advantage of the networking infrastructure by, for example, using a reverse proxy or using enterprise STS. In some situations this is not possible; one alternative is to use forms-based authentication.
When forms-based authentication is used for an extranet, it becomes more important to customize the login page to provide more information to the user, similar to what you see on the Microsoft Outlook Web Access login page.
In extranet scenarios where partners should have access to SharePoint sites, and when the partner does not support federated authentication, forms-based authentication is an alternative. Similar to the case described previously, it is useful to customize the login page to show more information to the user.
Branding Login Pages
A common scenario is to want to brand the login page to match the UI guidelines of the enterprise or to add information for the user, like a privacy notice, term of use, and instructions for how to log in or how to register as a new user.
Creating a "Remember Me" Capability
In some cases, you may want to enable users to have an option for remembering the user name and/or password, similar to what can be found on login pages like the Windows Live ID login pages.
Consider these additional cases where login page customization could be useful:
Consider these additional cases where login page customization could be useful:
- Troubleshooting forms-based authentication
- Adding "new user registration" logic
- Implementing a CAPTCHA mechanism
- Adding privacy notices
- Implementing "accept term of use" logic
- Adding antiphishing mechanisms (for example, site image verification)
Customizing Authentication Selection Pages to Provide Additional Information
As explained previously, when more than one authentication provider is configured in a zone, users are redirected to a page where they can select which authentication provider to use. When the user gets to this page, the page shows only a selection control (see Figure 7).
Figure 7. Default authentication selection page
 In some cases, you may want to provide additional information to aid the user in selecting the correct authentication provider. Another improvement that you can make is to add the logic for smart home realm discovery, so that users within a specific IP range are automatically redirected to the proper identity provider. There are other alternatives for smart home realm discovery; the best implementation depends on your specific scenario, and also on how you implement the home realm discovery.
Figure 8. Example of a home realm discovery page

Figure 7. Default authentication selection page
In some cases, you may want to provide additional information to aid the user in selecting the correct authentication provider. Another improvement that you can make is to add the logic for smart home realm discovery, so that users within a specific IP range are automatically redirected to the proper identity provider. There are other alternatives for smart home realm discovery; the best implementation depends on your specific scenario, and also on how you implement the home realm discovery.Figure 8. Example of a home realm discovery page
Adding Context-Based Claims to the User's Claims Token
Contextual claims are assertions that are given to the user based on a rule. For example, a contextual claim might contain the location of the client, such as the main corporate campus or a subsidiary. In this case, the value of the claim is calculated depending on where the client connects. Later on, during authorization, this information could be used to grant or deny permissions for a resource.
In high-security scenarios, these contextual claims can provide valuable information that can be used to restrict access to resources.
Using SharePoint 2010, you can accomplish this by:
In high-security scenarios, these contextual claims can provide valuable information that can be used to restrict access to resources.
Using SharePoint 2010, you can accomplish this by:
- Taking advantage of the claims provider infrastructure during claims augmentation.
- Implementing the rules of the contextual claims in the enterprise STS (or external STS).
- Provides a central point for managing the rules
- Eliminates the need to register and manage claims providers across multiple SharePoint farms
- Minimizes the risk of opening a security hole due to an improperly configured claims provider
| Note: |
|---|
| The downside of implementing the rules of contextual claims in the enterprise STS is that you have to create a claims mapping in SharePoint 2010 for each of the claims that you want to use. If you decide that you want to use different claims in SharePoint 2010, you have to go through a multistep process to remove the SPTrustedIdentityTokenIssuer from all zones that are using it, delete it, recreate it with the correct claim mappings, and then re-add it to all zones that were using it. Using a claims provider is more flexible and easier to change. A claims provider is also generally more powerful to use to connect to other systems, because you are just writing Microsoft .NET Framework code. |
Authenticating from a Client Application by Following the Pattern of Passive Authentication
There are scenarios where you may have to create a client application or add-in for the Microsoft Office client that is authenticating to SharePoint 2010. As you have learned in this article, the SharePoint 2010 authentication model is based in the WS-Federation passive profile that enables claims authentication scenarios for passive clients like Internet Explorer. Microsoft Office also uses this model when authenticating to SharePoint 2010.
To authenticate a call to SharePoint 2010, you have to follow the pattern that is used by passive authentication. To learn more about how to implement this pattern, see Remote Authentication in SharePoint Online Using Claims-Based Authentication. Alternatively, you can use the pattern that is described in the blog post Using the Client Object Model with a Claims Based Auth Site in SharePoint 2010.
To authenticate a call to SharePoint 2010, you have to follow the pattern that is used by passive authentication. To learn more about how to implement this pattern, see Remote Authentication in SharePoint Online Using Claims-Based Authentication. Alternatively, you can use the pattern that is described in the blog post Using the Client Object Model with a Claims Based Auth Site in SharePoint 2010.
Migrating ISAPI-Based Authentication Schemes to SharePoint 2010
In previous versions of SharePoint, additional authentication schemes were implemented in SharePoint by using the forms-based authentication flow and using custom ISAPI filters that handled the authentication process.
SharePoint 2010 implements the Internet Information Services 7 integrated pipeline, which does not support ISAPI filters. In addition to this, when a web application is configured for forms-based authentication, SharePoint 2010 makes an explicit call to the membership provider to validate the user's credentials. This causes some ISAPI-based authentication solutions to not work in SharePoint 2010.
SharePoint 2010 claims-based authentication gives you an authentication extensibility point by using the SAML claims–based authentication and the WS-Federation protocol.
Figure 9. Local security token service
 As Figure 9 shows, the authentication is done outside SharePoint 2010 in the identity provider STS. The custom authentication scheme can be implemented on the identity provider (or become the identity provider).
For more information about SAML authentication, see Configure Authentication Using a SAML Security Token on TechNet.
SharePoint 2010 implements the Internet Information Services 7 integrated pipeline, which does not support ISAPI filters. In addition to this, when a web application is configured for forms-based authentication, SharePoint 2010 makes an explicit call to the membership provider to validate the user's credentials. This causes some ISAPI-based authentication solutions to not work in SharePoint 2010.
SharePoint 2010 claims-based authentication gives you an authentication extensibility point by using the SAML claims–based authentication and the WS-Federation protocol.
Figure 9. Local security token service
As Figure 9 shows, the authentication is done outside SharePoint 2010 in the identity provider STS. The custom authentication scheme can be implemented on the identity provider (or become the identity provider).For more information about SAML authentication, see Configure Authentication Using a SAML Security Token on TechNet.
Supporting Claims Tokens Issued by SharePoint 2010 in Claims-Aware Web Services
One of the key requirements for collaboration scenarios is being able to share data. In most cases, the data that you want to use when collaborating comes from other systems. You can take advantage of the benefits of claims-based authentication to delegate the identity of the current user to the system where the information resides. For this to work, your system must be claims-aware and must support the WS-Federation protocol. If your system is not claims-aware, you can create a middle-tier that exposes the data via a claims-aware web service.
After you have the data exposed via a claims-aware web service, you can use the Microsoft Business Connectivity Services (BCS) in SharePoint 2010 to expose the data in SharePoint 2010. To learn more about how to enable this scenario, see Consuming a Claims-Enabled WCF Web Service as a SharePoint 2010 External Content Type.
After you have the data exposed via a claims-aware web service, you can use the Microsoft Business Connectivity Services (BCS) in SharePoint 2010 to expose the data in SharePoint 2010. To learn more about how to enable this scenario, see Consuming a Claims-Enabled WCF Web Service as a SharePoint 2010 External Content Type.
Enabling High-Security Authentication (2FA) in SharePoint 2010
Advanced authentication schemes like two-factor authentication (2FA) and client certificate–based authentication can be implemented in SharePoint 2010 by using SAML authentication. Identity management products, like AD FS 2.0, support high-security authentication, including 2FA. In this scenario, and similar to the previous scenario, the external STS is used to authenticate the user via any of the authentication methods that are supported by the provider.
For more information about configuring SharePoint 2010 for client certificate–based authentication, see Configure Client Certificate Authentication (SharePoint Server 2010) on TechNet.
To learn more about configuring SharePoint 2010 with SAML authentication, see Configure Authentication Using a SAML Security Token on TechNet.
For information about configuring AD FS 2.0, see AD FS 2.0 Deployment Guide on TechNet.
Conclusion
As explained in this article, you can take advantage of the benefits of claims-based authentication to enable different authentication scenarios. You can also make customizations to improve the user experience when collaborating through SharePoint 2010.
Configuring Forms Based Authentication in SharePoint 2010
Hopefully folks are starting to get some use out of the multitude of SharePoint 2010 postings I’ve been tossing up here. This is a new one that I was a little hesitant to put together…given my history in SharePoint 2007 I don’t want to become typecast but…in this post I’ll give a quick walk through on creating a forms based authentication site in SharePoint 2010.
For those of you who’ve read my various blogs (http://blogs.msdn.com/sharepoint/archive/2006/08/16/702010.aspx being the most popular) and three-part series on FBA for SharePoint 2010 (part 1 starts here: http://msdn.microsoft.com/en-us/library/bb975136.aspx), most of this should look pretty familiar. We’re going to follow a very similar process to what we did in SharePoint 2007, with a couple of twists. At a high level, we’re going to:
1. Create a new web application
2. Configure support for FBA in central admin, our new web app, and a new thing in SharePoint 2010 called the STS web service
3. Add a User Policy to our web app that will grant an FBA user rights to the site
4. Login to the site and start using it!
For our example we’ll use the LDAP provider that ships in SharePoint 2010 for our directory. Let’s look at each of these steps in more detail now.
Step 1 – Create a New Web Application
Start by going to the Central Administration web site. Click on Manage Web Applications, then click on the New button in the ribbon to create a new web application. In the new web application dialog we’re going to select the following settings:
· Authentication: Claims Based Authentication
· Identity Providers
o Check the Enable Windows Authentication box or you won’t be able to crawl the site
o Check the Enable ASP.NET Membership and Role Provider checkbox
§ In the Membership provider name edit box, type LdapMember
§ In the Role provider name edit boxy, type LdapRole
· I won’t cover all of the other sections in the new web app dialog because they aren’t specific to using FBA, so just fill them in with whatever values are appropriate for your implementation
When you’re all done click the OK button to create the new web application. Now that the web app is created, I Highly Recommend That You Create A New Site Collection In It Now! I’ll move forward assuming you have done as I’ve suggested. Now…okay – step 1 is done, let’s keep moving.
Step 2 – Configure FBA Support
This step is where we go through that same process as 2007, where we need to add some entries to the web.config file for our web application, and we need to do it on each web front end in the farm. The basic chunk of Xml we’re going to work with for the LDAP provider looks like this; I’ve highlighted the parts in yellow that you will want to change for your implementation:
<membership>
<providers>
<add name="LdapMember"
type="Microsoft.Office.Server.Security.LdapMembershipProvider, Microsoft.Office.Server, Version=14.0.0.0, Culture=neutral, PublicKeyToken=71e9bce111e9429c"
server="stevedc.steve.local"
port="389"
useSSL="false"
userDNAttribute="distinguishedName"
userNameAttribute="sAMAccountName"
userContainer="CN=Users,DC=steve,DC=local"
userObjectClass="person"
userFilter="(ObjectClass=person)"
scope="Subtree"
otherRequiredUserAttributes="sn,givenname,cn" />
</providers>
</membership>
<roleManager enabled="true" defaultProvider="AspNetWindowsTokenRoleProvider" >
<providers>
<add name="LdapRole"
type="Microsoft.Office.Server.Security.LdapRoleProvider, Microsoft.Office.Server, Version=14.0.0.0, Culture=neutral, PublicKeyToken=71e9bce111e9429c"
server="stevedc.steve.local"
port="389"
useSSL="false"
groupContainer="CN=Users,DC=steve,DC=local"
groupNameAttribute="cn"
groupNameAlternateSearchAttribute="samAccountName"
groupMemberAttribute="member"
userNameAttribute="sAMAccountName"
dnAttribute="distinguishedName"
groupFilter="(ObjectClass=group)"
userFilter="(ObjectClass=person)"
scope="Subtree" />
</providers>
</roleManager>
Copy this chunk of Xml into something like notepad and change the parts highlighted in yellow to values that will work in your environment. Now you can copy from there into each of the config files we need to change. Unfortunately we’ll need to use a slightly different version of this in each web.config file. Let’s start with the easy one first – central admin. Find the web.config file for central admin and open it up in your favorite editor, like notepad. Scroll down to the <system.web> entry, and paste the entire chunk of Xml directly below it. Save your changes and the first one’s done.
The next one we’re gonna hit is the web.config for the Security Token Service (STS) virtual directory. Explaining what the STS does, what claims based auth is, etc. is all way beyond the scope of this posting, but we’ll get to those things in time. For now, we need to find the directory where it’s web.config file is and the easiest way to do that is to open the IIS Manager. Expand the plus sign next to the server name. Expand the plus sign next to the Sites object. Expand the plus sign next to the SharePoint Web Services virtual directory. Beneath it, find the SecurityTokenServiceApplication virtual directory. Click on it, then click on the Content View button in the bottom of the middle part of the screen. That will cause the Explore link to appear in the Actions pane on the right hand side of the screen (it’s the third link down from the top). Click the Explore link and Windows Explorer will open up and you will see the web.config file you need to work with. Open up the web.config file in a text editor and scroll all the way down to the bottom. Directly under the </system.net> entry, do the following:
1. Add a <system.web> entry and press enter.
2. Copy and paste in the chunk of Xml shown above.
3. Add a </system.web> closing tag directly below the stuff you pasted in.
4. Find the <roleManager> element in the chunk of Xml you pasted in, and delete the defaultProvider attribute. That leaves your roleManager element looking like this: <roleManager enabled="true">
Save your changes and the second one’s done. Now, go find the web.config file for the new FBA web application you created and open it up in notepad. When you configured the web application to support claims based authentication, it automatically added in some Membership and Role provider information that points to a custom set of providers SharePoint 2010 adds out of the box. So all we need to do is to just add in our provider into the correct section in the web.config. IMPORTANT: For those of you who are used to doing this for SharePoint 2007, please note that the providers are in the opposite order of what you are used to seeing. The Role provider is listed first, and the Membership provider is listed second. Scroll down the web.config file until you find the roleManager element (it’s a ways down there). Copy out just the role provider definition from the chunk of Xml above and paste it below the <roleManager><providers> sections. So you will paste in just this part (with your site specific info replacing the part in yellow):
<add name="LdapRole"
type="Microsoft.Office.Server.Security.LdapRoleProvider, Microsoft.Office.Server, Version=14.0.0.0, Culture=neutral, PublicKeyToken=71e9bce111e9429c"
server="stevedc.steve.local"
port="389"
useSSL="false"
groupContainer="CN=Users,DC=steve,DC=local"
groupNameAttribute="cn"
groupNameAlternateSearchAttribute="samAccountName"
groupMemberAttribute="member"
userNameAttribute="sAMAccountName"
dnAttribute="distinguishedName"
groupFilter="(ObjectClass=group)"
userFilter="(ObjectClass=person)"
scope="Subtree" />
Now scroll down a little more and do the same thing to add in your Membership provider. Find the <membership><providers> element and right below paste in membership provider stuff from the chunk of Xml above (with your site specific info replacing the part in yellow):
<add name="LdapMember"
type="Microsoft.Office.Server.Security.LdapMembershipProvider, Microsoft.Office.Server, Version=14.0.0.0, Culture=neutral, PublicKeyToken=71e9bce111e9429c"
server="stevedc.steve.local"
port="389"
useSSL="false"
userDNAttribute="distinguishedName"
userNameAttribute="sAMAccountName"
userContainer="CN=Users,DC=steve,DC=local"
userObjectClass="person"
userFilter="(ObjectClass=person)"
scope="Subtree"
otherRequiredUserAttributes="sn,givenname,cn" />
Step 3 – Add A User Policy
This part is basically exactly the same as you did in SharePoint 2007, with a couple of very minor differences. Go to the central admin site and click on Manage web applications. Click on your new FBA web application, then click on the User Policy button in the ribbon; this brings up the User Policy dialog. Now do the following steps:
1. Click on the Add Users link.
2. In the Zones drop down, select the Default zone and click the Next button.
3. Click the Address Book icon. This will bring up the people picker and will let you know real quickly whether everything is configured correctly or not. The first thing you should notice is the you see a new interface. I think it’s going to be called the Principal Picker or some other equally nerdy name, but you get the point – it allows you to search in one dialog and show matches from all of the directories you have configured. It’s pretty slick. So go ahead and type in the NT login name or account name (use whatever nomenclature you prefer here) and click the search button. If it’s working correctly you should see at least two entries for the account – one that is for the user’s Active Directory account, and one that is for that same account but which was found using the LDAP provider.
4. Select the account in the User section and click the Add button.
5. Click the OK button.
6. Check the Full Control checkbox, then click the Finish button.
That’s it – everything should be all configured now for you to log into your new FBA site.
Step 4 – Login
Go ahead now and navigate to the site in your FBA web application. You should get an initial prompt where it asks you what kind of authentication you want to use to access the site – Windows Authentication or Forms Authentication. Select Forms Authentication from the drop down and the page posts back with a standard forms login page. Enter the credentials of the user to which you granted the Full Control user policy and you should log into the site. Now you can start adding other FBA members and roles into SharePoint groups so they can access the site to.
All Done!
Well, that’s all there is too it. If you’ve never done it before it probably seems kind of complicated, just like the first time folks did it in SharePoint 2007. If you have set it up before in SharePoint 2007 though, the process probably seems pretty straightforward. Hopefully this post will get everyone moving the right direction and able to start using FBA with their new SharePoint 2010 sites. Good luck!
Good Article.
Introduction
This article explains step by step information on configuring Form Based Authentication (FBA) in SharePoint 2010. This article would be useful for developers/designers/architects and those who want to implement form based authentication (FBA) for their SharePoint 2010 sites as a business requirement.
We cannot use the classic / basic claimed based authentication for all business scenarios. I was recently working on a consumer portal or product selling site where form based authentication is most appropriate. This article resolves authentication issues by configuring a SharePoint 2010 site with form based authentication.
Difference between MOSS 2007 and SharePoint 2010
There is no huge difference in configuring FBA for a MOSS 2007 site and a SharePoint 2010 site. You cannot implement FBA for a SharePoint 2010 class authentication site. FBA can be implemented only for a claims authentication site in SharePoint 2010.
In MOSS 2007, it is required to configure the web.config file of the FBA site and Central Administration site. In SharePoint 2010, it is required to configure the web.config file of the FBA site, Central Administration site, and the Security Token Service (STS) web.config file. STS is one of the next generation Single Sign On services used to store credentials of an application in SharePoint 2010.
I have also written article on enabling FBA in a MOSS 2007 site in CodeProject and Blogger and is available here. CodeProject: http://www.codeproject.com/Articles/19055/Form-Authentication-for-MOSS-2007-Site, Blogger: http://nagendra-gunaga.blogspot.in/2012/03/form-based-authentication-fba-for-moss.html.
Steps to Configure FBA in SharePoint 2010
Below are the steps required to configure FBA in SharePoint 2010. I will be using MS SQL database as membership store for users.
A) Setting up ASP.NET Forms Authentication User and Role Data Source
1. Create Database
2. Configure Membership and Role Provider
3. Create User
B) Create Web Application and Site Collections
C) Configure Web.Config file
1. Configuring FBA web application web.config file
2. Configuring Central Administration web application web.config file
3. Configuring Security Token Service web.config file
D) Adding User Policy to the FBA Web Application
E) Verification Steps
A) Setting up ASP.NET Forms Authentication User and Role Data Source
This section explains creation of database which is used to store user's information such as credentials and roles which is used for Form Authentication. This section also explains the configuration of Membership and Role providers in the web.config file and creation of users using ASP.Net configuration wizard. This article shows creating a user and which will be used for testing Form Authentication later.
1. Create Database
To create database, Microsoft has provided a tool/ utility called
aspnet_regsql.exe that creates a database for us. This utility can be found in %windir%\Microsoft.Net\Framework64\v2.0.50727 folder. Please see the image below:
Executing aspnet_regsql.exe file will open ASP.Net SQL Setup wizard that will walk through creating the ASP.Net database. I have added the database name as FBANetDB and configured it for windows authentication. Please see the image below:
Click on Next button. Please see the image below:
Select Configure SQL Server for application services option and click Next button. Please see the image below:
Click Next button. Now the database FBANetDB is created successfully. Please see the image below:
2. Configure Membership and Role Provider
In the previous section, database is created successfully. Now we need to add a user in to database. Using ASP.NET Configuration Wizard, users can be added the database. This can be achieved by creating web site that will allow us to add the users and roles and also ensure the database connection strings, membership and role providers are correctly configured before we bring SharePoint in to equation.
Below steps explains creating web site and configuring membership and role providers and executing ASP.Net Configuration Wizard.
a) Open Visual Studio 2010 and select File ? New ? Web Site. In the New Web Site dialog, select the ASP.Net Web Site template and enter the location to store the web site files. Please see the image below:
You can choose any location whichever is comfortable for you. web.config file will be added to project automatically.
b) By default, you will see a <connectionStrings/> node within <configuration> node. Specify the connection string to the database which has been created in the previous section. Please see the image below:
I have mentioned server as GUNAGA1. This is the server in which SQL Server 2008 is installed. Please mention the respective server name.
Also add the membership provider and role provider within <system.web> tag. See the below image for more information.
c) Save web.config file and launch the ASP.Net Configuration Wizard by clicking on Website ? ASP.Net Configuration. Please see the image below:
d) Set the authentication type in the above wizard. To do this, click Security link. In the Security tab, under Users section, click Select authentication type link. Select From the internet option and press Done button which is available in the bottom right corner. By selecting this option, which means that site will use form authentication to identify users. Please see the image below:
e) To test the membership and role providers, click on Provider tab. In the Provider tab, click on Select a different provider for each feature (advanced) link. Select right / correct membership and role provider and click Test link to ensure that providers are communicating to right database.
At this point, we configured web.config file with connection string and providers information. Also we tested the providers with the database. Next section will explain adding users to database.
3. Create User
a) To add users, click on Security tab. In Security tab, under Users section, click Create user link. Here I am adding user as testFBA and password as password which will be used for testing form authentication later. Please see the image below:
Now we have created a user successfully. Do not worry about creating roles at this time and will be explained later.
B) Create Web Application and Site Collection
Follow the below steps to create web application and site collection.
a. Go to Central Administration ? Application Management ? Select ‘Manage Web Application’ link present under ‘Web Applications’ section.
b. Click on ‘New’ option in the ribbon.
1. See the below image for ‘Authentication’ and ‘IIS Web Site’ section.
2. See the below image for ‘Security Configuration’ and ‘Claims Authentication Type’ section.
3. See the below image for configuring ‘Sign In Page URL’ and ‘Public URL’ section.
4. See the below image for configuring ‘Application Pool’ and ‘Database Name and Authentication’ section.
5. Create Site Collection after creating web application. Select the template whichever you want to create site collection.
C) Configure We.Config file
1. Configuring FBA web application web.config file
Open FBA web application web.config file and add the below entries.
a. Add Connection String. Connection String has to be added after </SharePoint> and before <system.web> tag. See the below image for more information.
b. Add Membership Provider and Role Provider
2. Configuring Central Administration web application web.config file
Open Central Administration web application web.config file and add the below entries.
a. Add Connection String. Connection String has to be added after </SharePoint> and before <system.web> tag. See the below image for more information.
b. Add Membership Provider and Role Provider
3. Configuring Security Token Service web.config file
Open Security Token Service web.config file from %Program Files%\Common Files\Microsoft Shared\web server extensions\14\Web Services\SecurityToken location and add the below entries.
a. Add Connection String. Connection String has to be added above <system.web> tag. See the below image for more information.
b. Add Membership Provider and Role Provider
D) Adding User Policy to the FBA Web Application
Follow the below steps to add user policy to the web application.
a. Go to Central Administration ? Manage Web Applications ? Select the FBA web application and click on ‘User Policy’ option in the ribbon.
b. Click on ‘Add Users’ link and select ‘Default’ as the zone and click on ‘Next’ button.
c. Type the user name created in ‘Create User’ section in the ‘Users’ textbox and click on people picker icon. You should see the user name get underlined in the ‘Users’ textbox.
d. Follow the verification steps to test form based authentication.
E) Verification Steps
1. Go to FBA SharePoint site and select ‘Forms Authentication’ option.
2. Enter User Name and Password and select ‘Sign In’ button.
3. You should be redirected to home page.
No comments:
Post a Comment